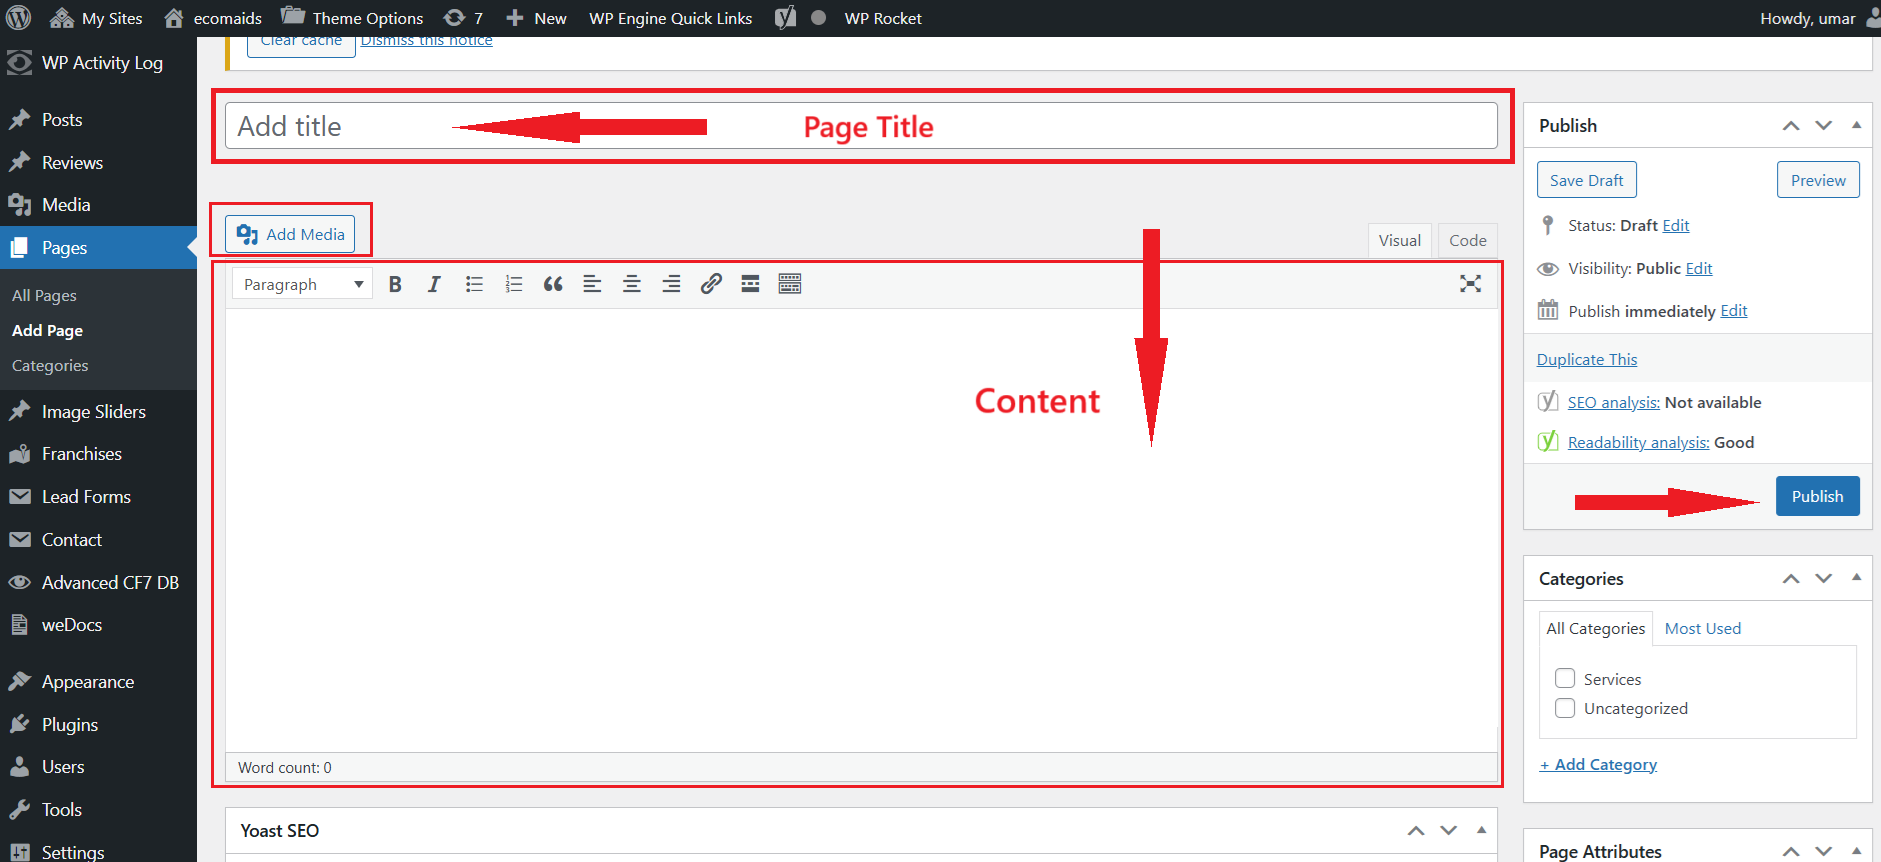
Creating a New Page
- Go to Pages > Add New
- Enter a title and page content using the editor
- Optionally, choose a template (from the right sidebar)
- Click Publish to make the page live
Pages are typically used for static content such as “About Us”, “Services”, or “Contact”.

Additional Resources:
- https://www.youtube.com/watch?v=tYP2zgD8Jw8
- How to Add a Page in WordPress – SiteGround Tutorial – This tutorial includes steps for both the Block Editor (Gutenberg) and the Classic Editor. Since this website uses the Classic Editor, focus on that portion of the guide.
- Classic Editor Explained – Glossary – A brief overview of the Classic Editor, including how it differs from the Block Editor and when to use it.
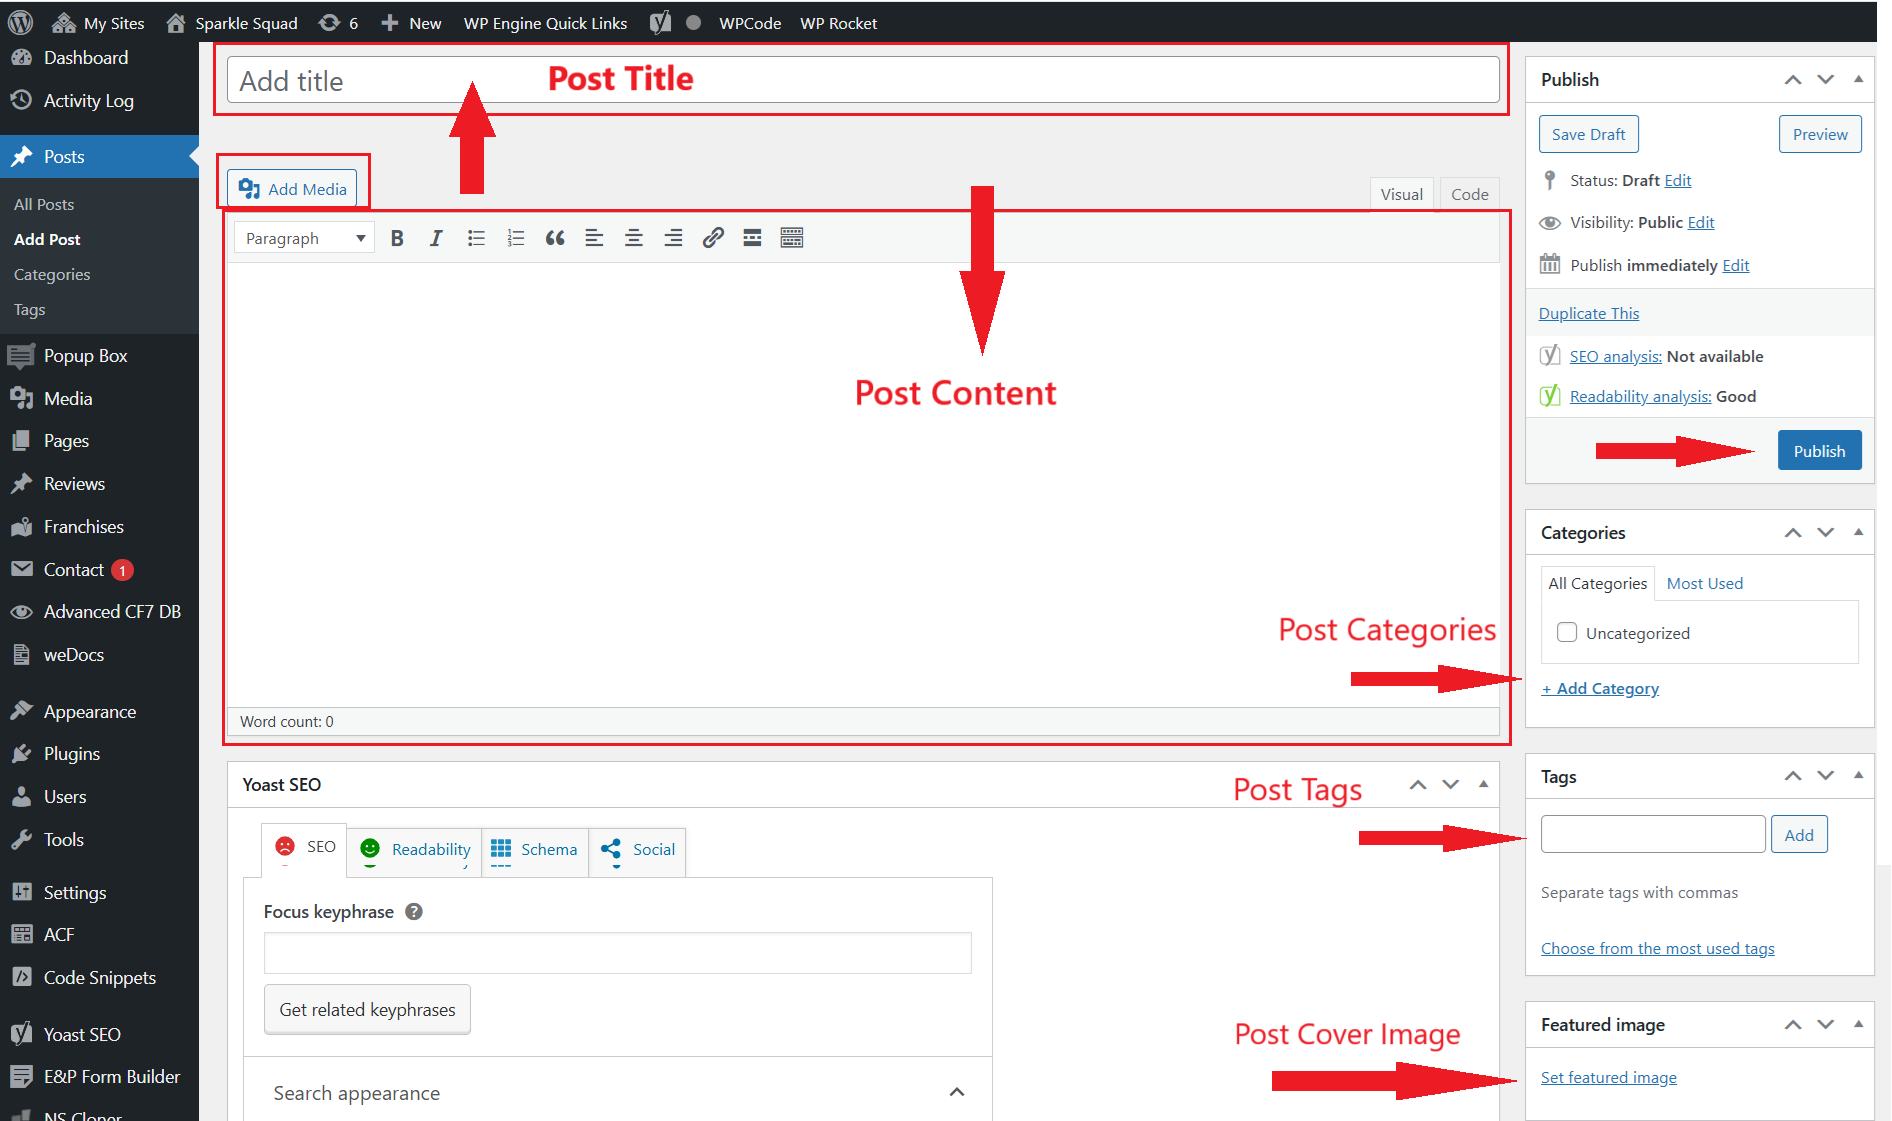
Creating a New Post
- Go to Posts > Add New
- Enter a title and post content
- Assign a category and add tags to organize the post
- Click Publish to make the post visible on the blog or news section
Posts are used for blog content, company updates, and SEO articles.

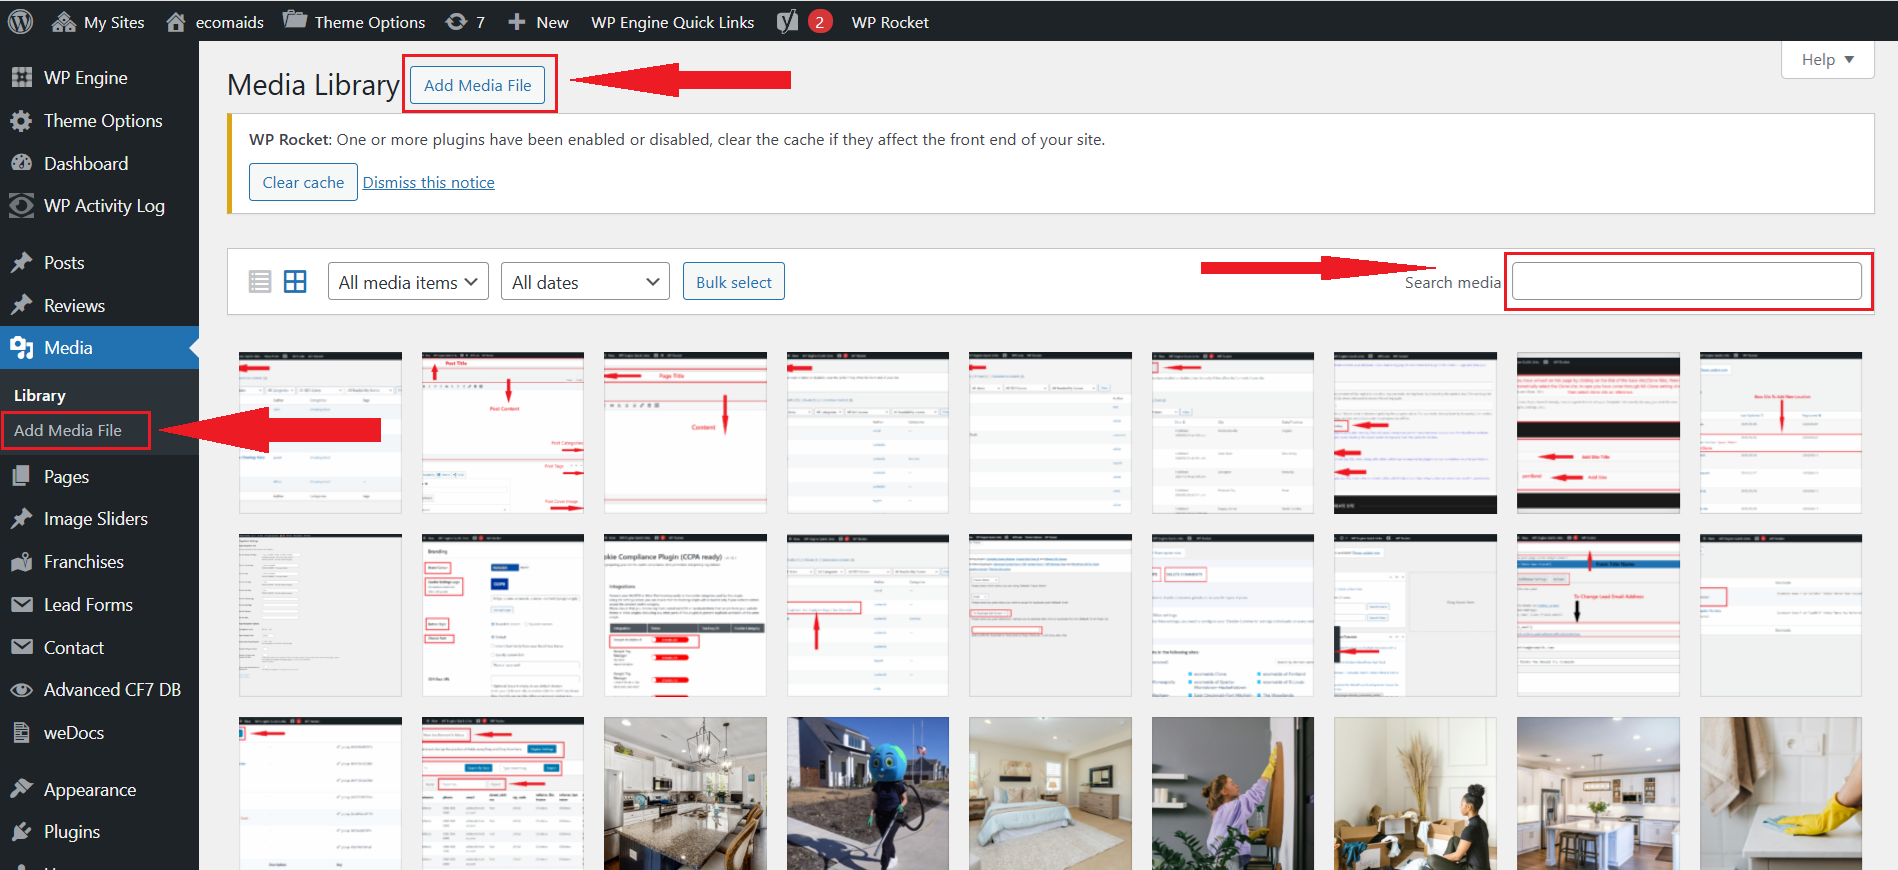
Uploading Media (Images, PDFs, etc.)
- Go to Media > Add New
- Drag and drop files into the uploader or click to select files from your computer
- Once uploaded, you can insert media into any post or page using the editor
Recommended formats: JPG, PNG, PDF, MP4
Best practice: Optimize images before uploading to improve site performance.
Managing Navigation Menus
- Go to Appearance > Menus
- Select a menu to edit (or create a new one)
- Add items such as pages, posts, custom links, or categories
- Drag and drop to reorder menu items
- Click Save Menu to apply changes
Menus control site navigation. Make sure all important pages are easily accessible.

User Management (Per Site)
Site Administrators can manage users for their own individual sites.
To Add a New User:
- Go to your site’s dashboard
- Navigate to Users > Add New
- Enter the username and email address
- Select a role (e.g., Administrator, Editor, Author, Contributor)
- (Optional) Check “Skip Confirmation Email”
- Click Add New User
- Edit the user to set a password or display name if needed
Each user role has different permissions. Assign roles based on the level of access needed.
Site-Specific Settings
Each site in the multisite network has its own settings panel.
Key Settings:
- General – Site title, tagline, timezone, date/time format
- Reading – Homepage display, blog page settings, number of posts per page
- Discussion – Comment moderation settings, comment notifications
- Permalinks – URL format for posts and pages (e.g., /blog/post-name)
To access these, go to Settings from the site’s dashboard.
Creating a Contact Form (Using Contact Form 7)
To Create a New Form:
- Go to Contact > Add New
- Give the form a name (e.g., “Contact Us”)
- Use the form editor to add fields such as:
- Text field – for Name or Subject
- Email field – for Email Address
- Textarea – for Message
- Checkboxes or radio buttons – for service options
- File upload – if needed
- Submit button
- Click on the Mail tab and set:
- Recipient email
- Subject line
- Message body
- From address
- (Optional) Customize messages in the Messages tab
- Click Save
To Display the Form:
- Copy the shortcode provided after saving (e.g.,
{contact-form-7 id="123" title="Contact Us"}). Replace the curly braces {} with square brackets [] when pasting into a page or post.
(Curly braces are used here to prevent the shortcode from being parsed.) - Paste it into any page, post, or widget area
Contact forms are typically embedded on Contact pages, landing pages, or service-specific pages.
Additional Resource: For a detailed walkthrough on how to create and customize forms using Contact Form 7, refer to this external guide:

 (800) 326-6243